Installation
Typhoon can be installed locally with pip or using docker. To test airflow (especially on Windows) we recommend using the docker version.
Use the DEV version when installing it locally.
The [dev] version comes with all the libraries and tools that make development easier.
`pip install typhoon-orchestrator[dev]`
The production version is lightweight for use with Lambda.
Hello World - 5 min walkthrough
After installation we recommend following Hello World example. You can use the rest of 'Getting Started' section here for details in each step should you need it.
with pip
Optionally - Install and activate virtualenv
python3 -m venv typhoon_venv
source ./typhoon_venv/bin/activate
pip install typhoon-orchestrator[dev]
# Create a project
typhoon init hello_world
# Try the Cli
cd hello_world
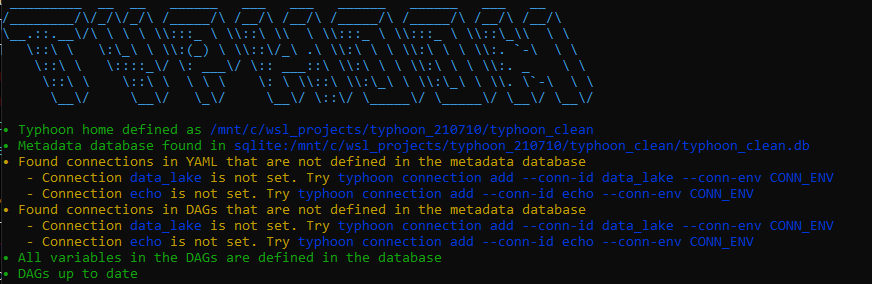
typhoon status
Let's try our first steps adding a few connections.
# Add your connection
typhoon connection add --conn-id data_lake --conn-env local
typhoon connection ls -l

# add the echo one too for completeness
typhoon connection add --conn-id echo --conn-env local
typhoon connection ls -l

#final check of status to show it's successfully been added.
typhoon status
Bash/ZSH/Fish auto-complete
- bash eval "$(_TYPHOON_COMPLETE=source_bash typhoon)"
- zsh eval "$(_TYPHOON_COMPLETE=source_zsh typhoon)"
- fish eval "$(_TYPHOON_COMPLETE=source_fish typhoon)"
With Docker and Airflow
To deploy Typhoon with Airflow you need:
- Docker / Docker Desktop (For now, you must use Gitbash on Windows. Currently, there is an open issue on WSL2.)
- Download the docker-compose.yaml (or use curl below)
- Create a directory for your TYPHOON_PROJECTS_HOME
The following sets up your project directory and gets the docker-compose.yml:
TYPHOON_PROJECTS_HOME="/tmp/typhoon_projects" # Or any other path you prefer
mkdir -p $TYPHOON_PROJECTS_HOME/typhoon_airflow_test
cd $TYPHOON_PROJECTS_HOME/typhoon_airflow_test

# For Windows WSL2 Users - for other env. its optional
sudo chown -R $USER: $TYPHOON_PROJECTS_HOME/typhoon_airflow_test
mkdir airflow
mkdir data_lake
mkdir src

curl -LfO https://raw.githubusercontent.com/typhoon-data-org/typhoon-orchestrator/master/docker-compose-af.yml
Important
On Windows Gitbash please run each docker-compose run one by one. They are quick.
docker-compose -f docker-compose-af.yml run --rm typhoon-af airflow initdb
docker-compose -f docker-compose-af.yml run --rm typhoon-af typhoon status
docker-compose -f docker-compose-af.yml run --rm typhoon-af typhoon connection add --conn-id data_lake --conn-env local  # Adding our first connection!
docker-compose -f docker-compose-af.yml run --rm typhoon-af typhoon dag build --all
docker compose -f docker-compose-af.yml up -d
Airflow FERNET_KEY
To make it easy to get started there is a default FERNET_KEY in the docker compose script. You can regenerate using the following:
docker-compose -f docker-compose-af.yml run --rm typhoon-af python -c "from cryptography.fernet import Fernet; FERNET_KEY = Fernet.generate_key().decode(); print('FERNET_KEY: ', FERNET_KEY)"
Then replace the key in the docker-compose-af.yml.
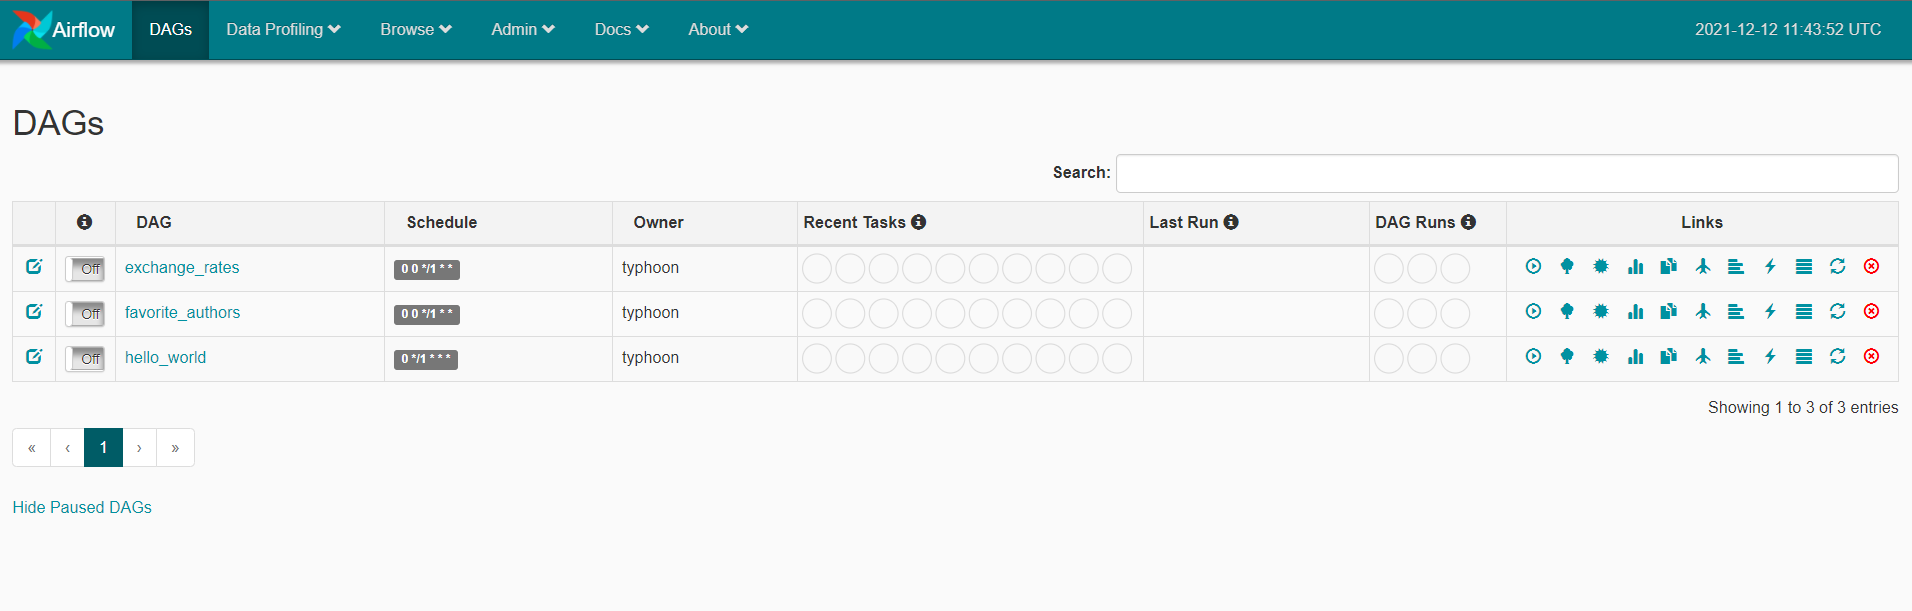
Checking Airflow UI
Then check the airlfow UI at http://localhost:8088
This runs a container with only 1 service, typhoon-af. This has both Airflow and Typhoon installed on it ready to work with.
Directories
Some directories are mounted which synchronizes files between your computer and the container.
- ./data_lake - for landing files (as a local dev environment)
- ./airflow_dags - where typhoon compiles your Airflow DAGs to
- ./src - Your Typhoon project
- ./src/dags - Where you develop your Typhoon YAML DAGs
Development hints
You should develop your dags in ./src/dags using your local editor (not within the container - the files sync).
You then access the docker container tyhpoon-af to use typhoon
docker exec -it typhoon-af bash
Inside the container bash:
typhoon status
typhoon dag build --all
If they successfully compile they will appear in ./airflow_dags, and also in the Airflow UI.
You may also need to restart the Airflow Container to see this list update.
Next steps: add connections shown in typhoon status before running - Hello World - 5 min walkthrough
After installation we recommend following Hello World example. This shows a ste-by-step of adding the connections, building and running our Hello World DAG.
typhoon connection add --conn-id data_lake --conn-env local
typhoon connection add --conn-id echo --conn-env local
typhoon dag build --all